How Can We Help?
Adding pages and custom links to the navigation menu
If you’ve created a new page for your website and want to add it to your menu, navigate to the dashboard of the CMS, and go to ‘Appearance’ > ‘Menus’.
Adding a page to your menu
Creating a page within WordPress doesn’t automatically add it to the navigation menu on your website. This is because there are times when you may want to create a page that is standalone and not linked eg a standalone marketing landing page, or private page. WordPress gives you a variety of customisation options when creating or managing menus. You can pick and choose pages, custom links, posts, etc to add to the menu. Once you have navigated to the Menu options, you will see that there may be 2 or 3 different menus to choose from. Make sure that the correct menu has been selected from the drop down box before adding any items.
Tip: You will need to make sure your page is published before adding it to the menu

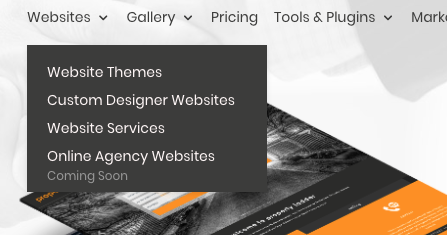
Once you have selected the correct menu, you will see the menu load below. The example menu below is from the ExpertWeb website. The parent items are shown with child items indented below them. By indenting those items they will list themselves under the parent link. See the screenshot below the menu structure.

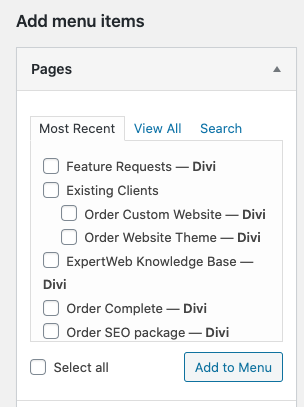
You will see in the left hand menu that you have a series of options when it comes to adding items to your menu. The most used items are pages. To add a page to your menu, you will need to select by clicking the checkbox next it. You have a series of filter options where you can see the most recent, view all, or search. If you have just created the page then it is likely that it will show at the top of the most recent list. Once you have clicked the checkbox, click add to menu.
The page will add as the last item in your in menu. To re-order the menu, simply click and drag the item into the position you want it to appear. If you want the item to appear as a primary link, ie. a link on it’s own, you will need to drag it so it is left aligned. However if you want the page to be a secondary/child item within a sub menu, you will need to drag the item underneath the parent item which should automatically indent the item so it appears in the submenu. You can also re-order your submenu items by clicking and dragging those too.
Don’t forget to save your menu after you have finished your changes.
Change the name of your page item
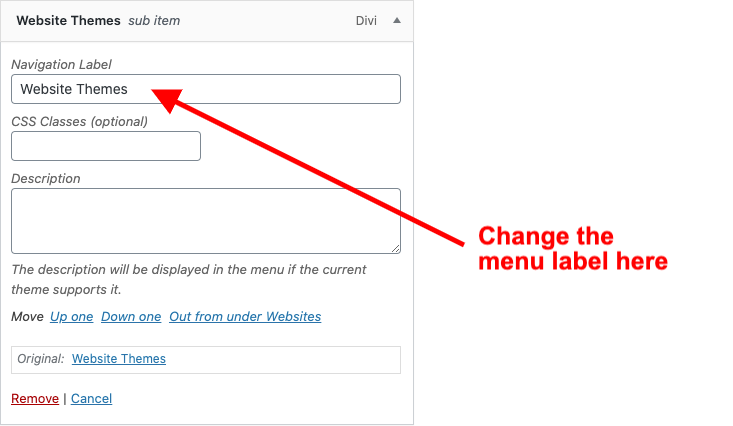
If you have a long page name, it may make your navigation menu title too long. You can edit the name of the page by clicking on the menu item, which expands to give you more options, and editing the navigation label.
Don’t forget to click ‘Save Menu’!
Adding a link to your menu
if you want to add a link to an external website or to an asset within your media library (eg brochure download), you can add these to your primary, or footer menus as a custom link.
From appearance > menus, in the ‘add menu items section select ‘custom links’.
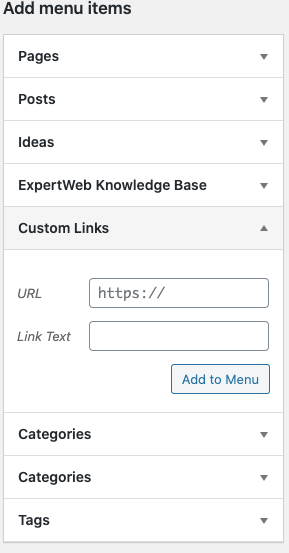
Add the url of the external website or media asset that you want to link to, and add the link text that you want to display eg ‘Brochure Download’.
If you are linking to an asset that has been uploaded to your media library, you can select the item and copy the url for it.
Don’t forget to click ‘save menu’