In order to use Google’s mapping API with your website, eg: to power your local area pages, you will need to create an account with Google that we can use on your behalf. Google provide an allowance of $200 per month, for the use of their mapping API which is more than adequate for the majority of websites.
Here’s how you setup the account:
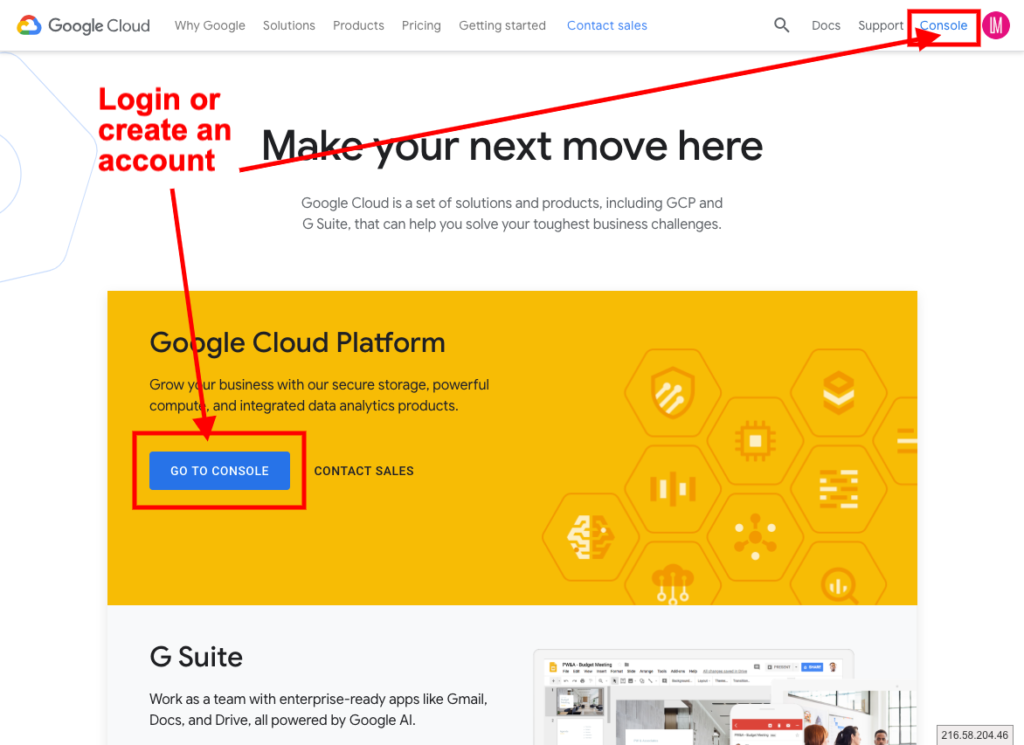
To access the Google Cloud account, you will need to ensure that you are logged in to your businesses Google Account (Google have one login for all their services). Once you are logged in navigate to Google Cloud: https://cloud.google.com/.
- Login to the Google Cloud platform with your existing Google Account for your business
- If you don’t have a Google Account, you can open one here: https://accounts.google.com/signup (see: https://support.google.com/accounts/answer/27441?hl=en)
You will need to create a Google Cloud Platform account and enable billing: https://console.cloud.google.com/getting-started (see: https://cloud.google.com/billing/docs/how-to/manage-billing-account)
- Open the console left side menu and select Billing.
- Click the New billing account button. (Note that if this is not your first billing account, first you need to open the billing account list by clicking the name of your existing billing account near the top of the page, and then clicking Manage billing accounts.)
- Enter the name of the billing account and enter your billing information. The options you see depend on the country of your billing address. Note that for United States accounts, you cannot change tax status after the account is created.
- Click Submit and enable billing.
Note: For each billing account, for qualifying Google Maps Platform SKUs, a $200 USD Google Maps Platform credit is available each month, and automatically applied to the qualifying SKUs. It is unlikely you will be charged anything, unless your website has particularly high traffic
Now give us permission to access your account (see: https://cloud.google.com/appengine/docs/standard/go/granting-project-access):
To add a project member and set permissions:
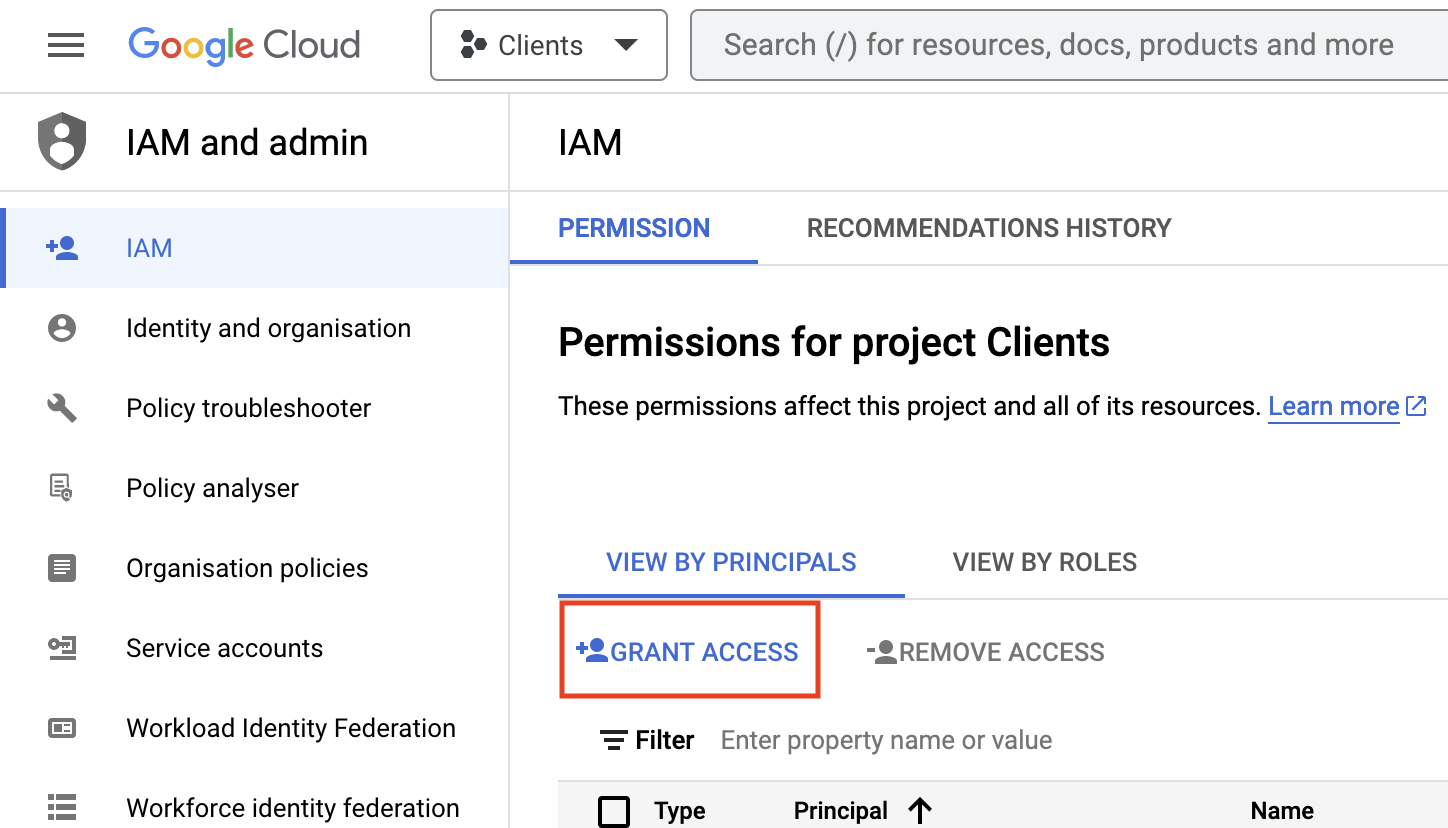
- In the Google Cloud Platform Console, visit the IAM & Admin Permissions page for your project: https://console.cloud.google.com/iam-admin/iam/project
- Create a project by clicking the three circles at the top of the page (1), which brings up a lightbox, click ‘new project’ (2). Give the project a name eg your company. You don’t need to select an organisation, unless you already have one set up within Google. Click the ‘create’ button.

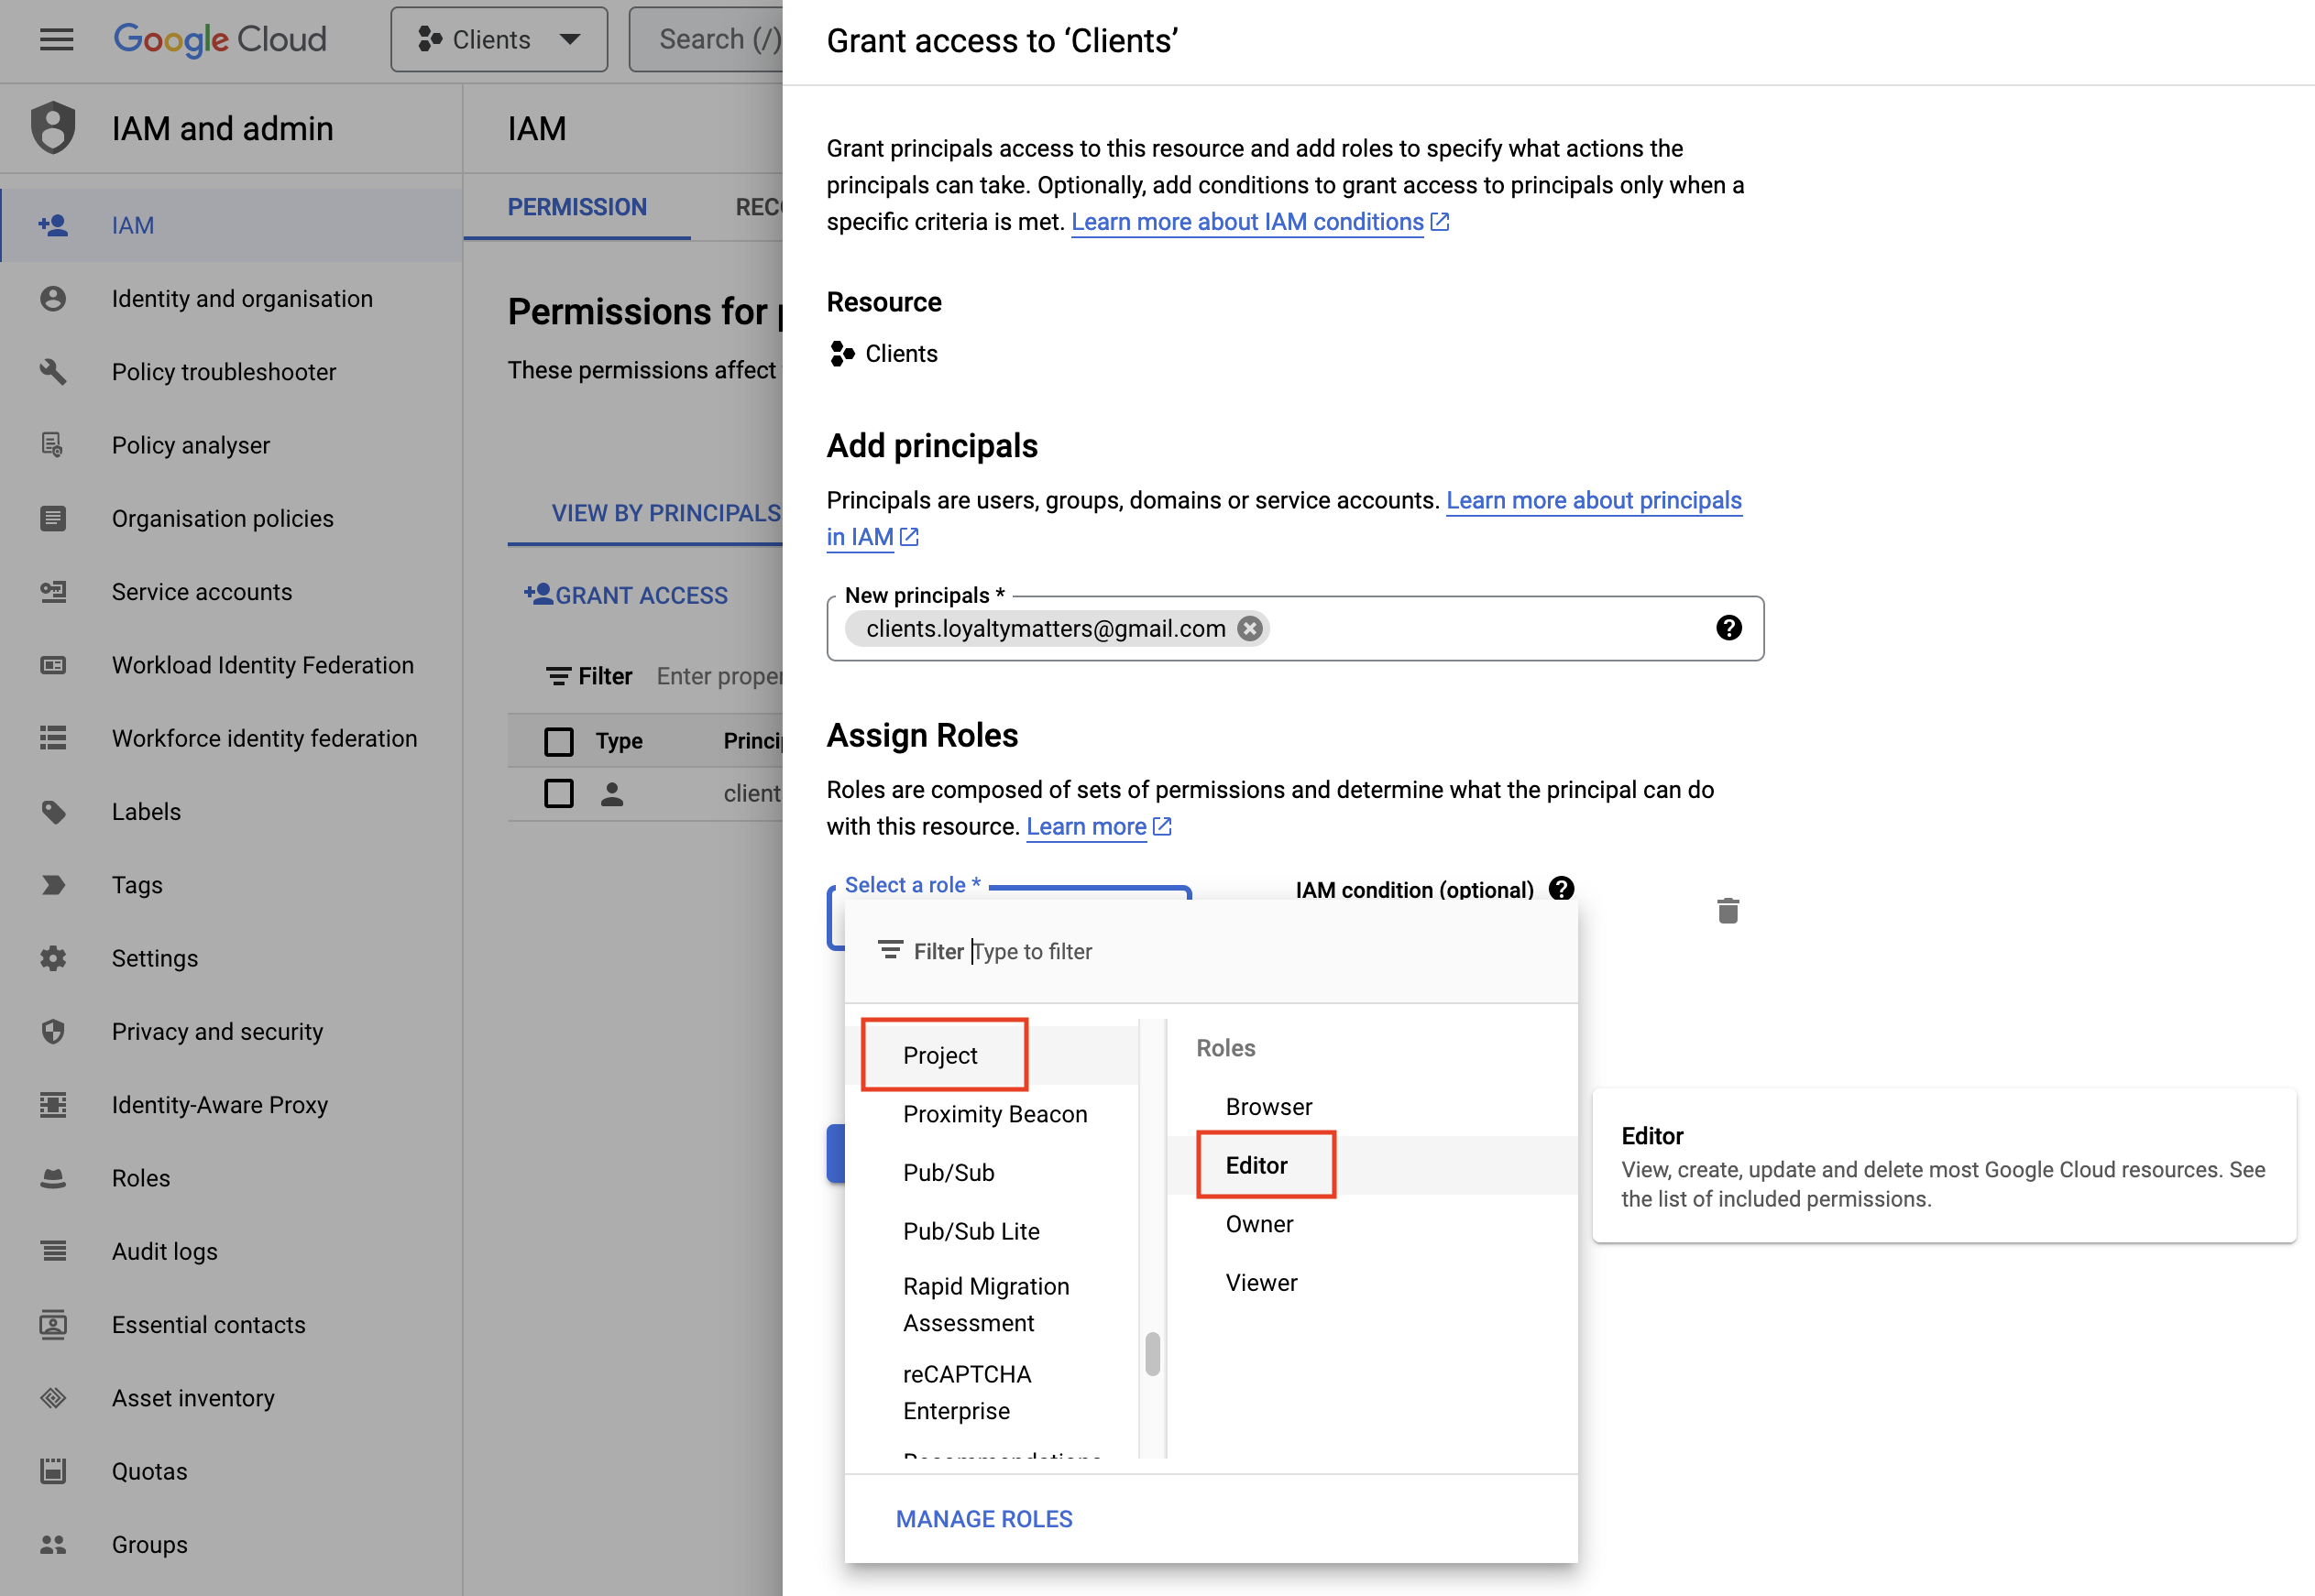
Now, go back to IAM & Admin. Click Grant Access to add new members to the project and set their roles using the dropdown menu.
Please invite us as a principal to your account using the email: [email protected]
Assign us a role. Please assign us as a project editor to your account
This will give us the access we need to be able to set up the API keys for your account, that we will need for your website.
If you need any help, just give us a call: t: 01423 857900 or email: [email protected]